P9 is the most amazing and latest smartphone of Huawei, released just a few days back in April- 2016. P9 has quite powerful hardware with dual lens Leica tech camera, 3GB RAM, 5.2-inch display, 950 HiSilicon Kirin processor and some others latest features. It’s overall is a combination of very impressive hardware and latest Android 6.0.1 OS. You might be aware of the core hardware specs and if you want to know then click here. In this guide, I am not going into that detail. However, if you grip P9 and willing to further improve its performance then root is the key action. Here we will learn how to Root Huawei P9 and Install TWRP 3.0 Custom Recovery. These are the two main tasks everyone should have to perform before going for further customization.
Rooting is an unofficial task and with doing so you will lose the warranty of your device. However, if you still want to Root Huawei P9 then follow the step by step method below. Also, backup your existing data and other items such as app, SMS, Call history, gallery items and contacts etc.
DISCLAIMER: Here using this tutorial you can Root Huawei P9 and Install TWRP 3.0 Custom Recovery only. Do not use for other variants or purpose. It will void P9 warranty. Perform all the operations carefully and solely at your own risk.

Preps| Downloads:
- Backup your whole data on P9 before the process.
- Install Huawei Hi-Suite or USB driver at the PC. [Download page]
- Enable USB Debugging at P9. => Settings. => Developer options. [Full guide]
- Install ADB and Fastboot drivers. [guide]
- Unlock the bootloader of P9 first. [Guide here]
Download TWRP Tool here. |Link| – |Name: ROOT-TWRP-HUAWEI P9.zip|.
Root Huawei P9 and Install TWRP 3.0
Steps to Install TWRP 3.0.
- Download the TWRP Tool zip file and unzip at the PC.
- Open TWRP extracted folder and double click “TWRP-HUAWEIP9.Bat” to run.
- Then turn off
- Boot into Fastboot Mode via press and hold [VOLUME DOWN+ POWER] at once.
- Then connect P9 to PC. => Click on command prompt window & hit enter key twice.
- The process starts auto and after flashing TWRP phone reboots.
Root Huawei P9.
- After flashing TWRP and normal boot. > connect P9 to PC.
- Copy the “BETA-SuperSU-v2.65.zip” to device from the already downloaded folder.
- Again turn off P9.
- Boot in TWRP recovery mode, [by holding pressed the VOL+ and POWER] buttons together.
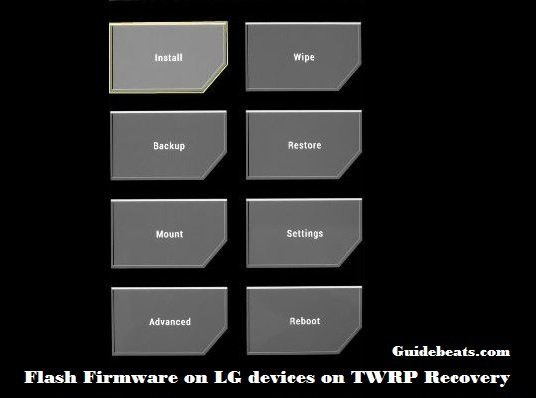
- Once P9 boots enter into recovery menu, tap “Install”.
- Browse and tap BETA-SuperSU-v2.65.zip file and do swipe to confirm.
- Go back to main recovery menu and tap “Reboot”.
That’s how to Root Huawei P9 and Install TWRP 3.0.


![How to Update Huawei P8 Lite to B574 Android Marshmallow [ALE-L21C185B574] How to Update Huawei P8 Lite to B574 Android Marshmallow [ALE-L21C185B574]](https://d13porlzvwvs1l.cloudfront.net/wp-content/uploads/2018/03/Update-Huawei-P8-Lite-to-B574-Android-Marshmallow-ALE-L21C185B574.png)


![Download and Install Marshmallow B898 on Huawei P8 Lite [OTA Update] [L21-Vodafone] Download and Install Marshmallow B898 on Huawei P8 Lite [OTA Update] [L21-Vodafone]](https://d13porlzvwvs1l.cloudfront.net/wp-content/uploads/2016/12/Download-and-Install-Huawei-P8-Lite-Marshmallow-B898-OTA-Update-L21-Vodafone.jpg)

And anyone knows how to remove root if we need to send it to warranty or its permanen and there’s no going back?
same question
to restore any device warranty, anytime, you only have to re-flash its official firmware.
to restore any device warranty, anytime, you only have to re-flash its official firmware. within the due time.