If you are looking for Guide root Huawei Nova 2i install TWRP Recovery then here I am with an easy Method. This phone is released by Huwaei the Nova 2i, in Sept ber, 2017 but at the start, this was available in selected markets which include China, India, Malaysia and the Philippines, among others.
Importance of rooting Huawei Nova 2i:
Rooting your Huawei Nova 2i will allow you to have full administrative access and you can do more with your Android gadgets. Benefits include removing bloatware, installing “incompatible” apps, blocking ads from apps, prolong battery life by underclocking, increase the speed by overclocking and installing a custom ROM on your rooted Android device.
Huawei Nova 2i Specifications:
- It boasts a 2.36 GHz octa-core CPU powered by a Kirin 659 chipset and a Mali T-830 MP2 GPU.
- Has 4 GB of RAM and 64GB of internal memory. And can accommodate up to 256 GB of external memory via MicroSD.
- The smartphone has a 5.9-inch all-screen display with an 18:9 aspect ratio.
- The IPS LCD display has the Full HD+ resolution (409 PPI).
- There are two cameras at the back and a fingerprint scanner is located below the vertically placed cameras.
- The LED flash has been integrated into the antenna band.
- A 3340 mAH Li-Ion battery powers the entire smartphone.
- The smartphone runs Android 7.0 (Nougat) with Huawei’s own EMUI version 5.1 interface.
- This comes in black, blue and golden colors.
How To Root Huawei Nova 2i
Rooting will lose your warranty. We are not responsible for any data loss or damage to the device. Create a backup of all your important data.Follow the steps below to root your Huawei Nova 2i.
Steps:
- Download Root Huawei Nova 2i.zip to your computer: Link
- Extract the file you downloaded to any folder on your computer.
- Enable “Developer Mode” on your smartphone. Do this by going to “Settings” > “About Phone” > then tap on the “Build Number” 5 times until a message pops up saying “You are now a developer“.
- Go back to “Settings” and scroll down until you see “Developer Options“. Tap on it to open.
- Enable both “OEM Unlocking” and ” USB Debugging“ and open the folder where you unzipped the downloaded file.
- Again, extract the “Huawei Android USB Driver” zip file and launch the application to install your smartphone’s drivers.
- Run the “abd-setup-1.4.3” application and promotion will be three times. Just press the “Y” key on all three prompts. This will install the “Android Debug Bridge” on your computer.
- Connect your smartphone to your computer using the USB cable provided.
- While holding the “Shift” key, right-click on the folder and choose “Open Command Windows Here“.
- In the Command Prompt, type the following “adb reboot bootloader“. You will see “daemon started successfully“.
- Next, type “fastboot OEM unlock”.
- Still in the Windows Command Prompt, type “adb reboot bootloader” then press “Enter“. Your phone should automatically reboot into “Flashboot Mode“.
- In “Flashboot Mode“, type “fastboot flash recovery TWRP-N7-G52017.img” to install “TWRP Recovery” on your Huawei smartphone.
- Press and hold the “Power” key and the “Volume Down” button at the same time to reboot your mobile.
- Press and hold the “Power” key and the “Volume Up” button one time while your smartphone is booting to enter TWRP Recovery.
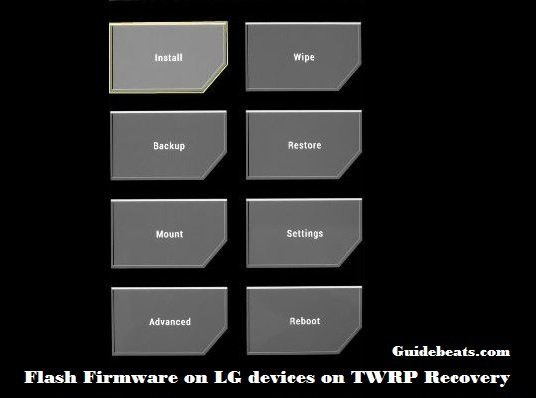
- While in TWRP Recovery, choose “Install” and select the “SuperSu” zip file from the file you extracted.
- Once the SuperSu file is selected, you can now “Swipe To Install“.
- After installation, go back to the “TWRP Recovery” Main Menu and select “Reboot” then “System Reboot“.
- Wait for your smartphone to finish rebooting.
If you have the “SuperSu“ app launch it to see if it is working.


![Download and Install Marshmallow B898 on Huawei P8 Lite [OTA Update] [L21-Vodafone] Download and Install Marshmallow B898 on Huawei P8 Lite [OTA Update] [L21-Vodafone]](https://d13porlzvwvs1l.cloudfront.net/wp-content/uploads/2016/12/Download-and-Install-Huawei-P8-Lite-Marshmallow-B898-OTA-Update-L21-Vodafone.jpg)


Leave a Comment