The Nexus 6 is one of the most popular devices that received the update version Android 6.0.1 recently. Now the Android 6.0.1 Marshmallow can be rooted by flashing SuperSU. Here are the guidelines to root Nexus 6 on Android 6.0.1 Marshmallow build MMB29K. Google has recently pushed an update for Android Marshmallow and the users, who have got these updates, maybe lost the root access. If anyone who came to face with this issue can take help from this guide to root Nexus 6 on Android 6.0.1 Marshmallow.

If you want to use your device with full performance, then you should have to get root access to the primary hidden partition and take full control of your device that’s called root access. if you are the user of Nexus 6 and want to root Nexus 6 on Android 6.0.1 then follow the below steps.
DISCLAIMER: We have made this guide only to root Nexus 6 on Android 6.0.1 Marshmallow build MMB29K, other devices are not compatible. Also, we www.guidebeats.com are not to be held liable for any damage, use at your own risk.
Early Preps:
- All your important data should be backed up before processing.
- The device charging status must be 70% or more.
- Google USB drive must be installed on your computer, before proceeding. [Download Link]
- On your device Enable USB Debugging Mode, navigate to [Settings > Developer options]
- Install and setup ADB and Fastboot drivers on your window PC. [how to]
- You will lose the warranty of your device through this unofficial operation.
Req. Downloads:
SuperSU zip for Nexus 6 from here –|Download Link|
TWRP Recovery for Nexus 6 from here –|Download Link|
Steps to root Nexus 6 on Android 6.0.1 Marshmallow build MMB29K
- Connect the Nexus 6 to PC via USB cable and copy the “SuperSU” on the root folder of device internal storage.
- Move the downloaded TWRP recovery file to the already installed ADB folder on the C:\ drive of your PC.
- Then disconnect your phone from PC and turn it completely OFF.
- Boot your device into bootloader mode, via [Press and hold the Volume Down + Power buttons at the same time until you can see the bootloader screen on your device display]
- Now re-connect Nexus 6 to your PC, and then go to ADB folder > press and hold shift key +right click on any empty space > then select “Open command window here” on the popup menu.
- Then in command prompt window enter command “fastboot flash recovery openrecovery-twrp-2.8.5.0-shamu.img” to flash TWRP recovery.
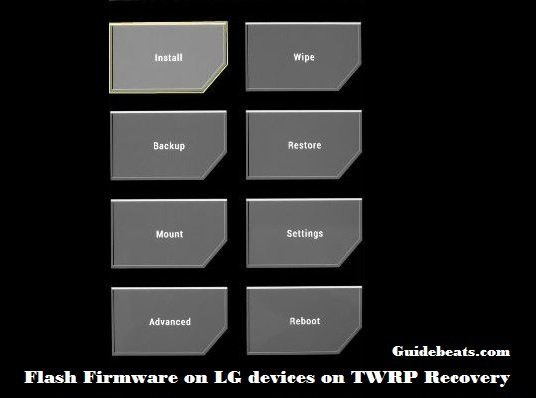
- Then on the menu choose recovery option, to go into TWRP recovery.
- Once you are on recovery menu select “Install” > next locate and select “SuperSU.ZIP” > then swipe at the bottom to install.
- Come back to TWRP recovery and select “Reboot” to boot Nexus 6 normally.
That’s how to root Nexus 6 on Android 6.0.1.


![How to Update Huawei P8 Lite to B574 Android Marshmallow [ALE-L21C185B574] How to Update Huawei P8 Lite to B574 Android Marshmallow [ALE-L21C185B574]](https://d13porlzvwvs1l.cloudfront.net/wp-content/uploads/2018/03/Update-Huawei-P8-Lite-to-B574-Android-Marshmallow-ALE-L21C185B574.png)


![Download and Install Marshmallow B898 on Huawei P8 Lite [OTA Update] [L21-Vodafone] Download and Install Marshmallow B898 on Huawei P8 Lite [OTA Update] [L21-Vodafone]](https://d13porlzvwvs1l.cloudfront.net/wp-content/uploads/2016/12/Download-and-Install-Huawei-P8-Lite-Marshmallow-B898-OTA-Update-L21-Vodafone.jpg)

Leave a Comment