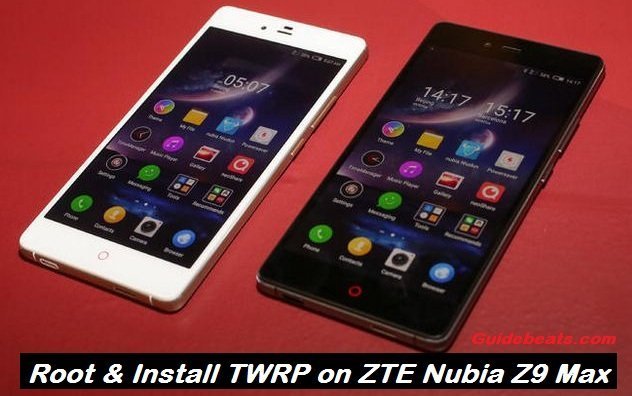
ZTE, a Chinese manufacturer company has its own name in the high-tech era. Recently ZTE has launched its latest flagship smartphone, the ZTE Nubia Z9 Max. Nubia Z9 Max came out with a very powerful hardware specification and is comparably a low-cost smartphone. ZTE Nubia Z9 Max is like Samsung phablets shaped smartphone, Nubia Z9 Max is a combination of powerful hardware, HD 5.5 inch display, 16 MP Main and 8 Megapixel secondary camera, 810 Qualcomm Snapdragon 64 bit octa-core CPU, 3GB RAM, 16 GB Internal storage with microSD support, 2900 mAh powerful battery, running on Android 5.0.2 Lollipop OS.
Like other smartphones and tabs you can Root and install custom recoveries on ZTE Nubia Z9 Max, for customization of your device. Root allows you to enhance the device performance, battery life, install third-party applications and remove bloatware apps from your smartphone etc. While Custom Recovery allows you to install custom ROMs, Install MODs, Nandroid Backup and wiping Dalvik cache etc.
If you are a user of Nubia Z9 Max and want to Root & Install TWRP on ZTE Nubia Z9 Max, then our this guide is very helpful towards you. Go ahead and follow the complete steps, don’t skip any step
Disclaimer: This method of Installing Custom Recovery and rooting is only for Nubia Z9 Max ZTE. Don’t try it on other devices, also we www.guidebeats.com are not held responsible for any damage caused by following this guide, try this on your own risk.
Contents
Pre-requisites
- Do charge your’s phone battery up to 80%
- Backup all of your important data on the phone and keep it safe.
- Arrange an original USB data cable to connect your phone to your PC.
- Install USB driver for your ZTE Nubia Z9 Max [Click here]
- Enable USB Debugging mode [Setting > Developer Options > USB Debugging]
Required Downloads:
Download ADB/Fastboot package. and extract ADB/Fastboot file on your PC. [Click Here]
Download TWRP Recovery for ZTE Nubia Z9 Max, Extract it on the name “recovery.img” [Click Here]
Download SuperSu.zip and copy it to ZTE Nubia Z9 Max internal storage. [Click Here]
Steps to Root & Install TWRP on ZTE Nubia Z9 Max
Install TWRP Recovery on Nubia Z9 Max
Step-1: Connect your Nubia Z9 Max to your PC. If it asks for some permission on the phone, check allow this PC and tap OK.
Step-2: Extract and copy TWRP “recovery.img” file to the ADB/Fastboot folder that you have just downloaded and extracted.
Step-3: Now open the extracted Minimal ADB/Fastboot folder where you also copied recovery.img file.
Step-4: Now click on py_cmd.exe file in order to open the command prompt.
Step-5: Now enter the following commands in command prompt one by one.
“adb devices”
This will display a list of the connected devices. > verify whether your device is connected or not.
“adb reboot-bootloader “
This will reboot your Nubia Z9 Max on bootloader mode.
“fastboot-i 0x19d2 flash recovery recovery.img”
This will flash TWRP recovery on your Nubia Z9 Max.
Step-6: As the Recovery flashing getting finished, select Recovery from Fastboot mode.
Step-7: If you see the TWRP logo here on the screen, that means you successfully flashed TWRP recovery.
Step-8: Tap Reboot > System in TWRP recovery to reboot your Nubia Z9 Max.
Root Nubia Z9 Max
Step-1: Copy SuperSu.zip file to your phone storage.
Step-2: Now boot your device into TWRP recovery mode.
- Turn it off completely first. Now turn it on by pressing and holding Volume Up + Power Key.
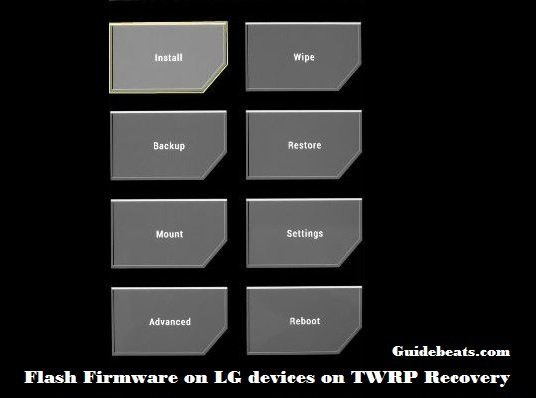
Step-3: Now on TWRP recovery > tap “Install” > Locate the SuperSu.zip file > tap this file > Now at the bottom of screen Swipe the bar to confirm flash”.
Step-4: After SuperSu.zip file is flashed, go back to main recovery TWRP and tap reboot > system.
Step-5: Now your device will boot. Find SuperSu in app drawer. Install Root Checker app to verify root access.
That’s all.
Cheers! Now TWRP flashed and root flashed on your Nubia Z9 Max.
For any query please do comment us


![How to Update Huawei P8 Lite to B574 Android Marshmallow [ALE-L21C185B574] How to Update Huawei P8 Lite to B574 Android Marshmallow [ALE-L21C185B574]](https://d13porlzvwvs1l.cloudfront.net/wp-content/uploads/2018/03/Update-Huawei-P8-Lite-to-B574-Android-Marshmallow-ALE-L21C185B574.png)


![Download and Install Marshmallow B898 on Huawei P8 Lite [OTA Update] [L21-Vodafone] Download and Install Marshmallow B898 on Huawei P8 Lite [OTA Update] [L21-Vodafone]](https://d13porlzvwvs1l.cloudfront.net/wp-content/uploads/2016/12/Download-and-Install-Huawei-P8-Lite-Marshmallow-B898-OTA-Update-L21-Vodafone.jpg)

Leave a Comment