Huawei MediaPad X2 comes with an impressive spec and is the latest tablet of Huawei. If you are the user of Huawei MediaPad X2 and going to improve the speed and performance of your MediaPad X2 Tablet, then you should have to first go through the process of installing Custom recovery like TWRP on your device and then you have to get root access. these are the initial steps for further customization and optimization your device.
If you willing to root Huawei MediaPad X2 and install custom recovery on it, then this guide is very much useful for you, here in this tutorial we are using TWRP recovery and SuperSU file to perform these operations, follow the complete guide step by step to Root Huawei MediaPad X2 and Install TWRP Recovery on it. Don’t skip any step.
In the following guide, we will first show you how to flash TWRP recovery, and then how to Root Huawei MediaPad X2. Let’s go
Disclaimer: This guide refers to Root Huawei MediaPad X2 and Install TWRP Recovery on MediaPad X2 only, don’t use it for any other device, also we www.guidebeats.com are not held responsible for any damage caused by following this tutorial, try it on your own risk.
Early Preparations:
- First of all take a backup of your important data on MediaPad X2 (save data on the PC)
- Your’s device battery should be charged more than 80%
- Install Huawei USB driver on your PC [Click here]
- Use an original USB data cable for smooth connectivity
- Enable USB Debugging Mode on your MediaPad X2, [Settings > Developer Options]
- Unlock the bootloader of your MediaPad X2, to guide [click here]
- After applying this guide, you will void your Huawei MediaPad X2 warranty.
Downloads required:
- Download and install Minimal ADB & Fastboot on your PC [Download here]
- Download TWRP recovery.img Rename it by “recovery.img” [Download here]
- Download SuperSu.zip file and copy it on your device internal storage [Download here]
Steps to Install TWRP Recovery on Huawei MediaPad X2
Step-1: Connect your MediaPad X2 with your PC via USB cable. If prompt, for permission on the phone, check on the “allow this PC”.
Step-2: Now open Minimal ADB & Fastboot folder on your PC, and Copy recovery.img file here.
Step-3: On Minimal ADB & Fastboot folder, Double click on “py_cmd.exe” in order to open the command prompt window.
Step-4: Now in command window type the following commands one by one and hit enter.
“adb devices”
- This will display connected adb devices. Check your device connectivity if find connected, then enter the next command, if not connected then reinstall USB driver.
“adb reboot-bootloader”
- This will reboot your MediaPad X2 and boot it into bootloader mode, then enter next command.
“fastboot flash recovery recovery.img”
- This will flash TWRP recovery on your MediaPad X2.
Step-5: After recovery flashing, in Fastboot mode on your device select recovery
Step-6: Tap Reboot in TWRP recovery, to reboot your MediaPad X2.
done!
Steps to Root Huawei MediaPad X2
Step-1: Turn your device OFF and Boot it into TWRP recovery mode. To do so, turn on your device by pressing and holding Volume Down + Power Key at the same time.
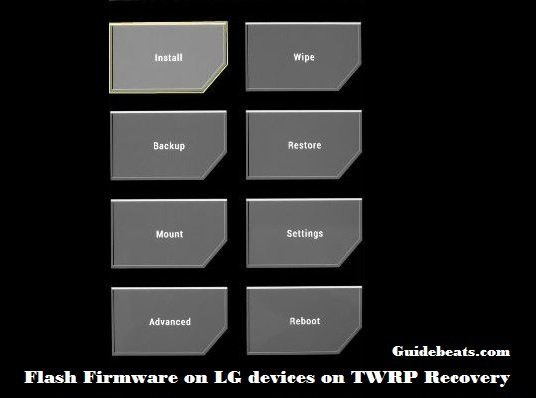
Step-2: On TWRP recovery, tap “Install” then locate and select the copied SuperSu.zip file and Swipe at the bottom of the screen to confirm flash”.
Step-3: Once SuperSu.zip file is flashed, go back to TWRP recovery menu and tap on reboot then system.
Step-4: when the device gets bootup, Find SuperSu in app drawer, open it and if prompt for binary updates, do update it.
- Install Root Checker app from Google play store for verifying root access.
You’re done! This was how to Root MediaPad X2
For any issue do comment us,


![How to Update Huawei P8 Lite to B574 Android Marshmallow [ALE-L21C185B574] How to Update Huawei P8 Lite to B574 Android Marshmallow [ALE-L21C185B574]](https://d13porlzvwvs1l.cloudfront.net/wp-content/uploads/2018/03/Update-Huawei-P8-Lite-to-B574-Android-Marshmallow-ALE-L21C185B574.png)


![Download and Install Marshmallow B898 on Huawei P8 Lite [OTA Update] [L21-Vodafone] Download and Install Marshmallow B898 on Huawei P8 Lite [OTA Update] [L21-Vodafone]](https://d13porlzvwvs1l.cloudfront.net/wp-content/uploads/2016/12/Download-and-Install-Huawei-P8-Lite-Marshmallow-B898-OTA-Update-L21-Vodafone.jpg)


Leave a Comment